Installing and Configuring GPU on AWS EC2 Instance
Setting up a GPU on an Amazon EC2 instance can significantly enhance your computational power, especially for tasks involving machine learning, data analysis, and graphical processing. This interactive guide will walk you through the process of launching an EC2 instance with a GPU, installing the necessary drivers, and configuring the instance for optimal performance.

Apoorva
Aug 20, 2024 |
8 mins

Watch the video instead if you want quick instructions and resolution.
Step 1 : Increase the quota of EC2 Instance for GPU
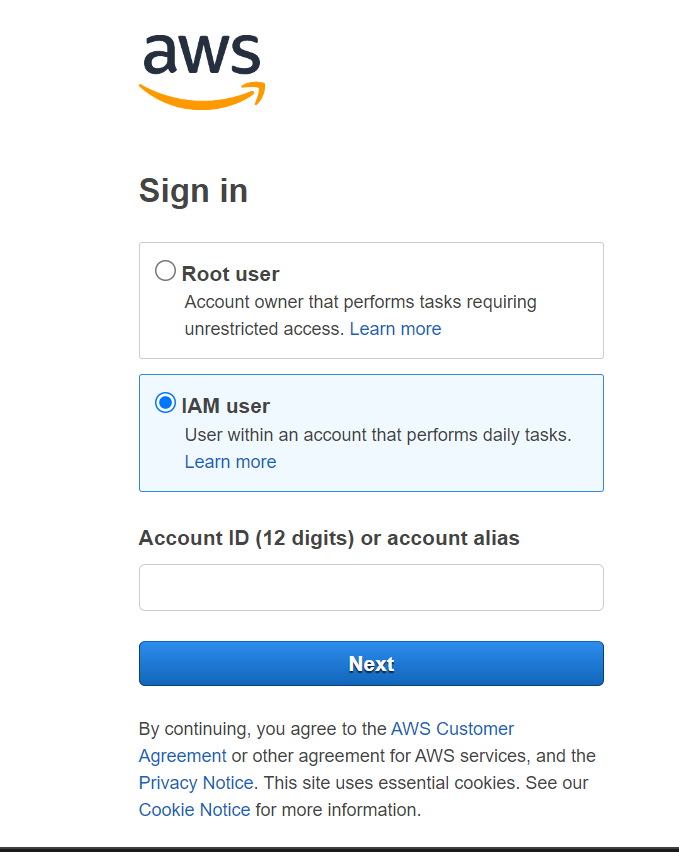
1 - Open the AWS Management Console and log in with your credentials.
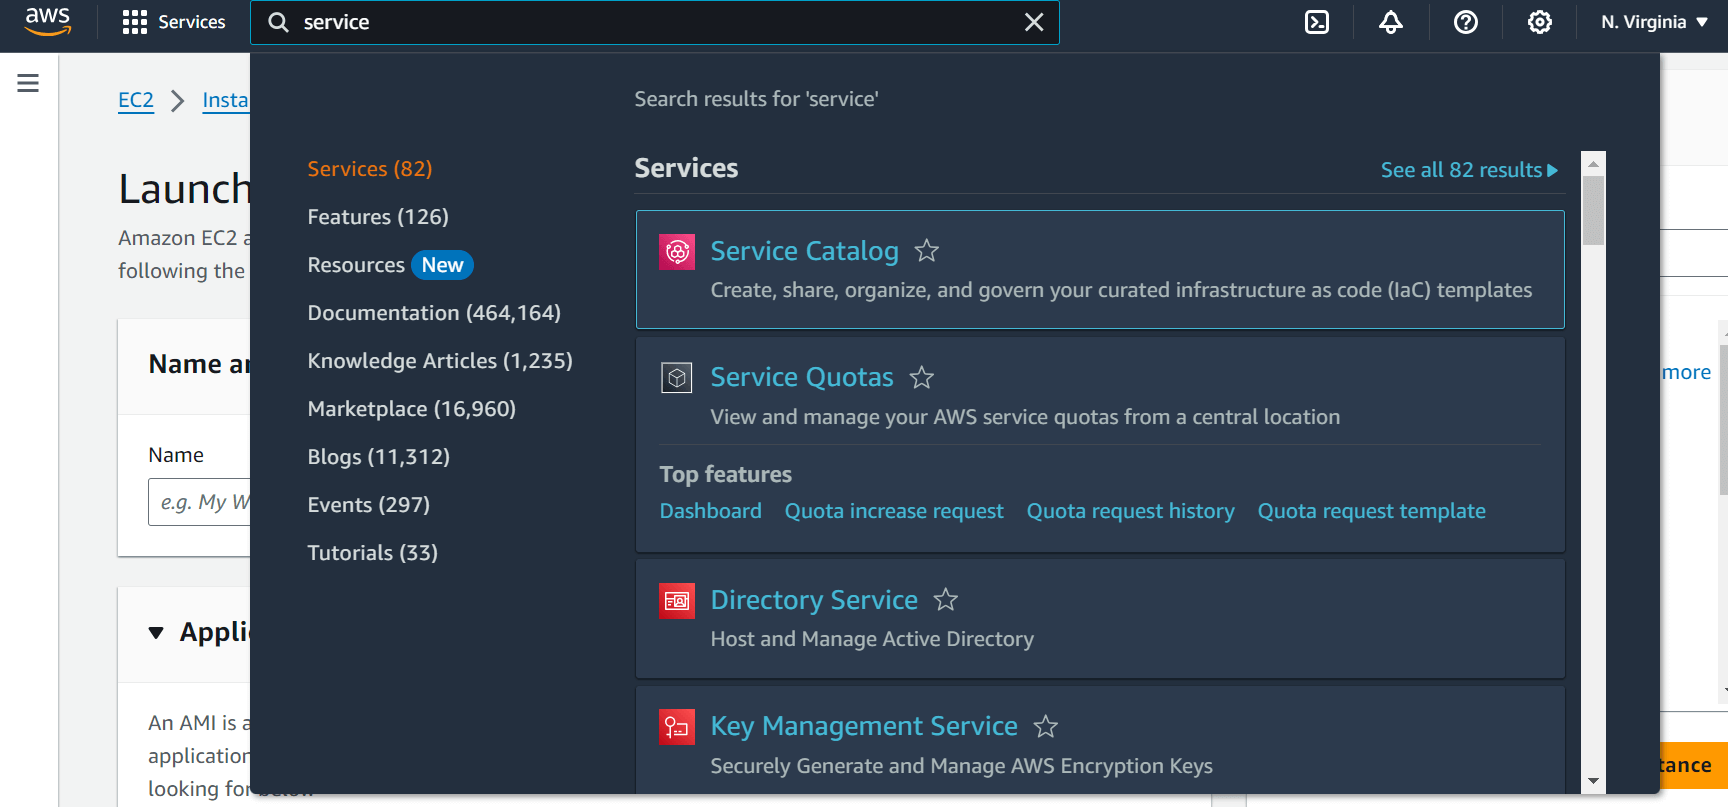
2 - Before we launch an EC2 instance, we need to increase the quota of whichever EC2 instance we aim to create. For that, we search and go to “Service Quotas”.
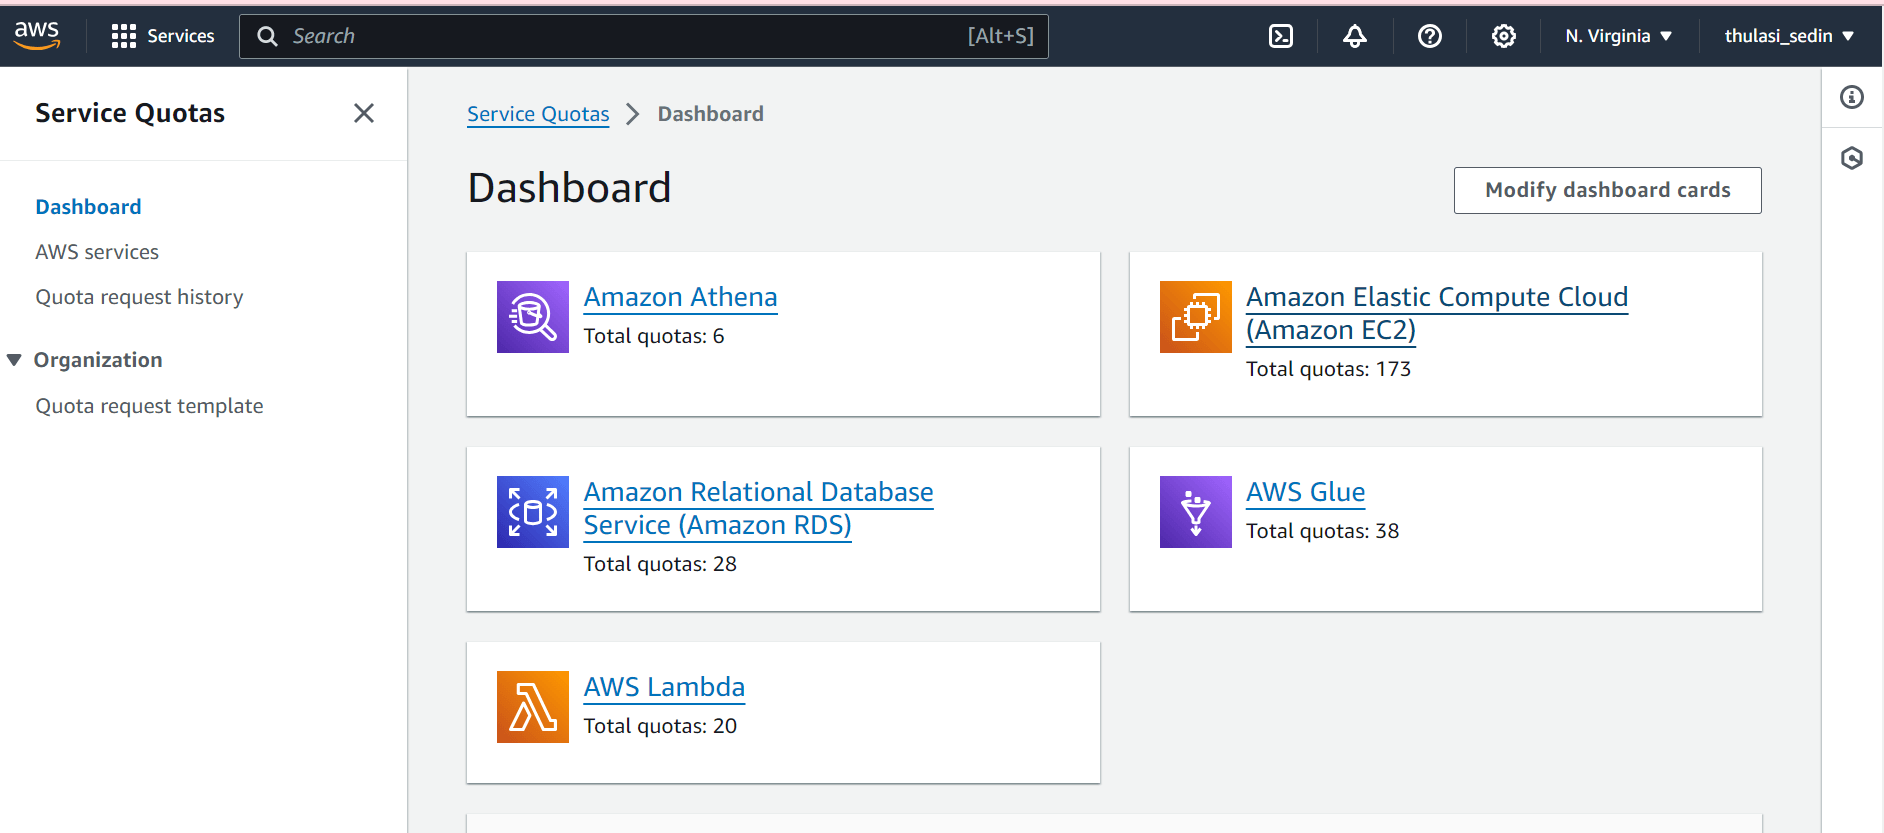
3 - In the Service Quotas Dashboard, click on “Amazon Elastic Compute Cloud(Amazon EC2)”.
4 - Search for “Running Dedicated p2 Hosts”.
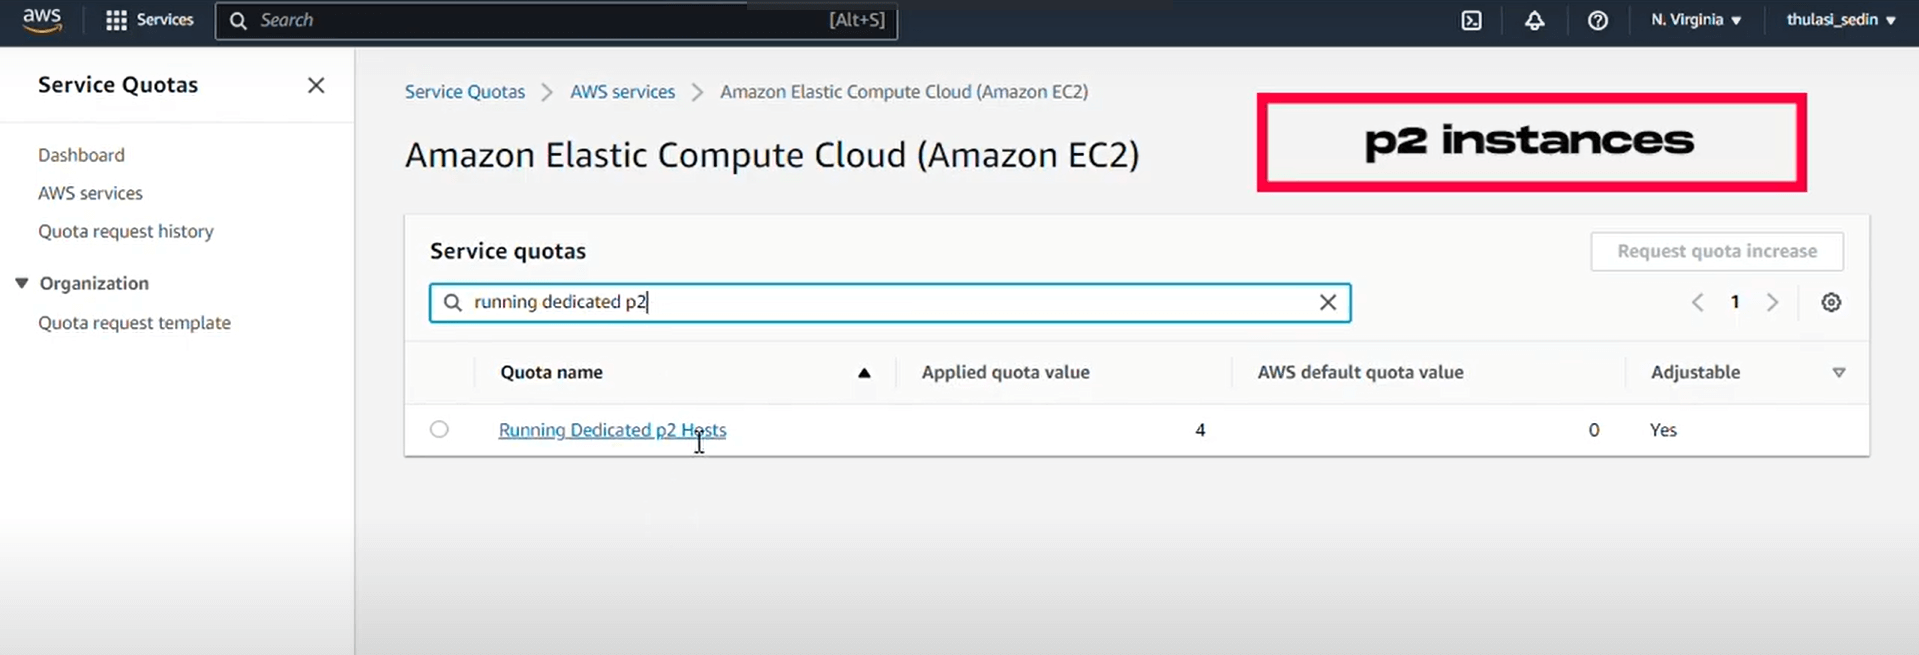
5 - Since we are going to run “p2.xlarge” instance , click on “Request quota increase”.
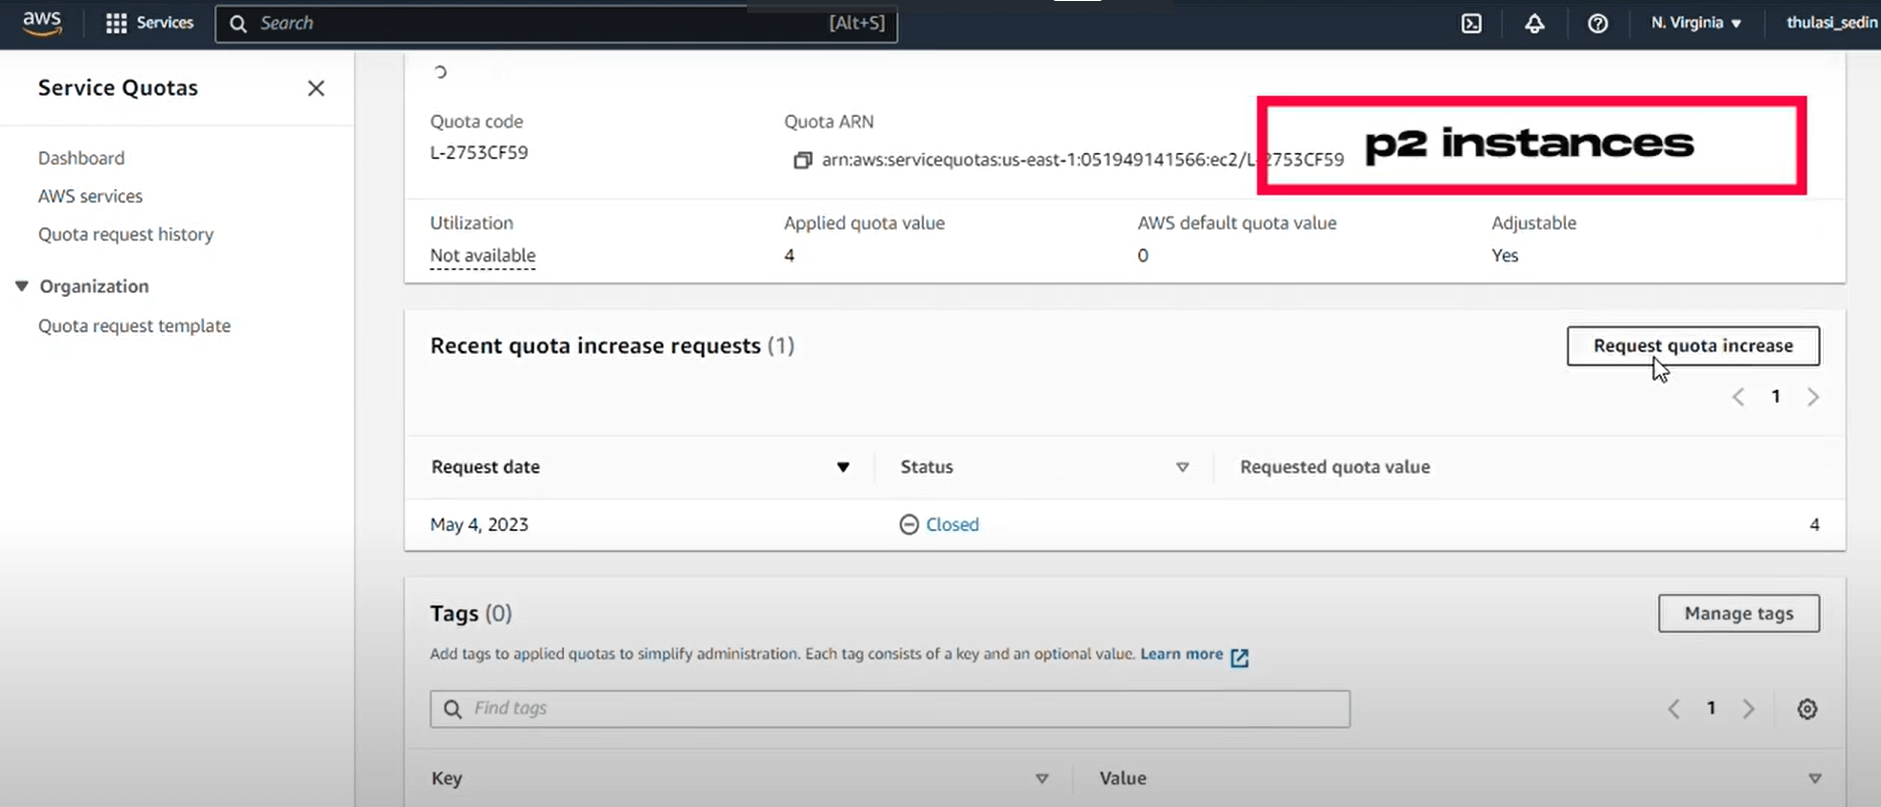
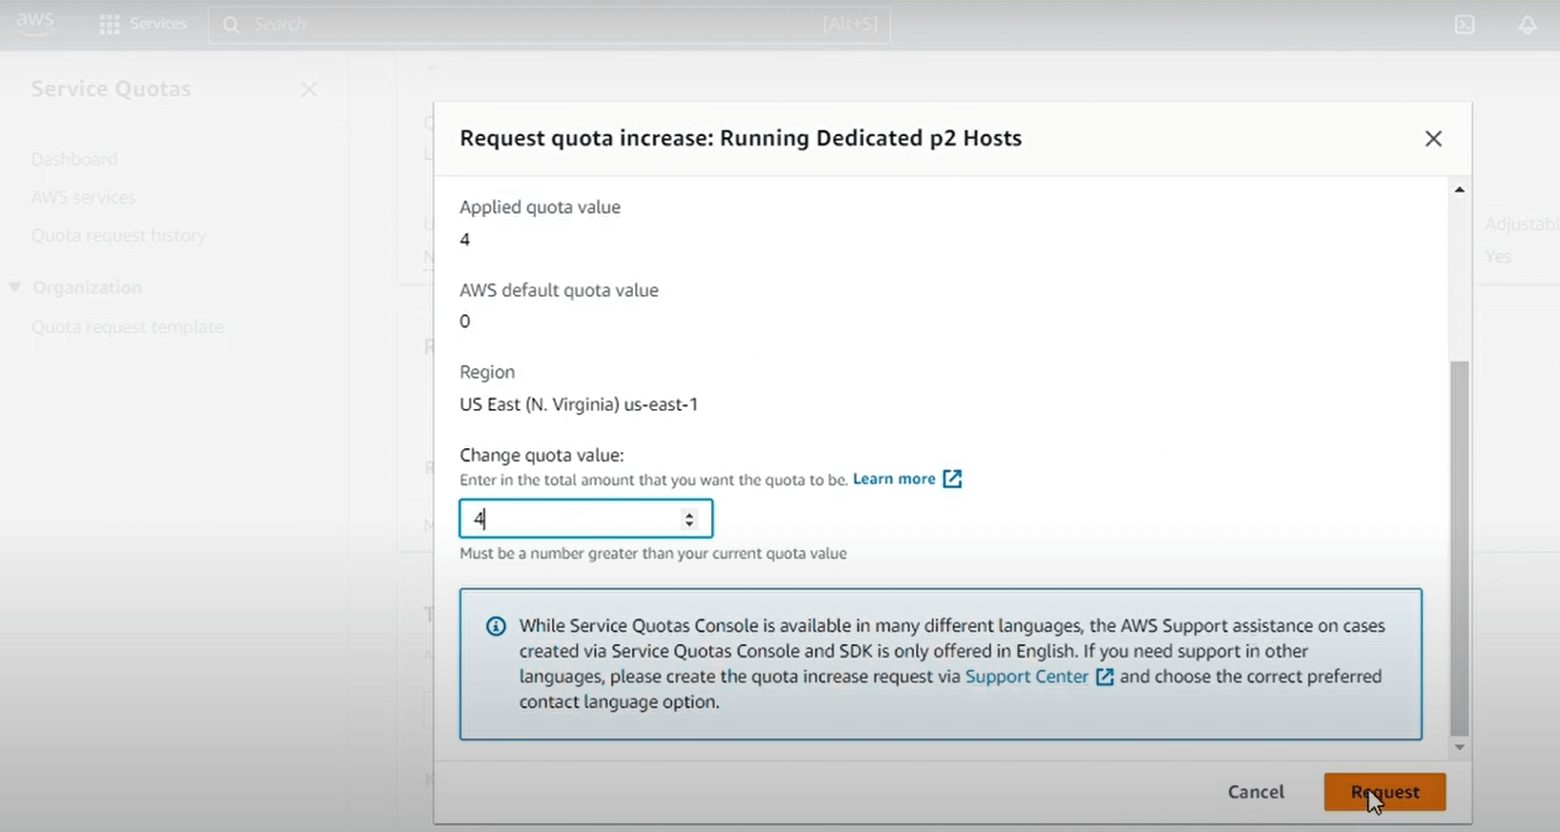
6 - A “p2.xlarge” needs at least 4 CPUs to work. So, we’ll change the quota value to 4 and then press “Request”. This might take a day or two, so make sure you do it early.
Step 2 : Launch an EC2 Instance
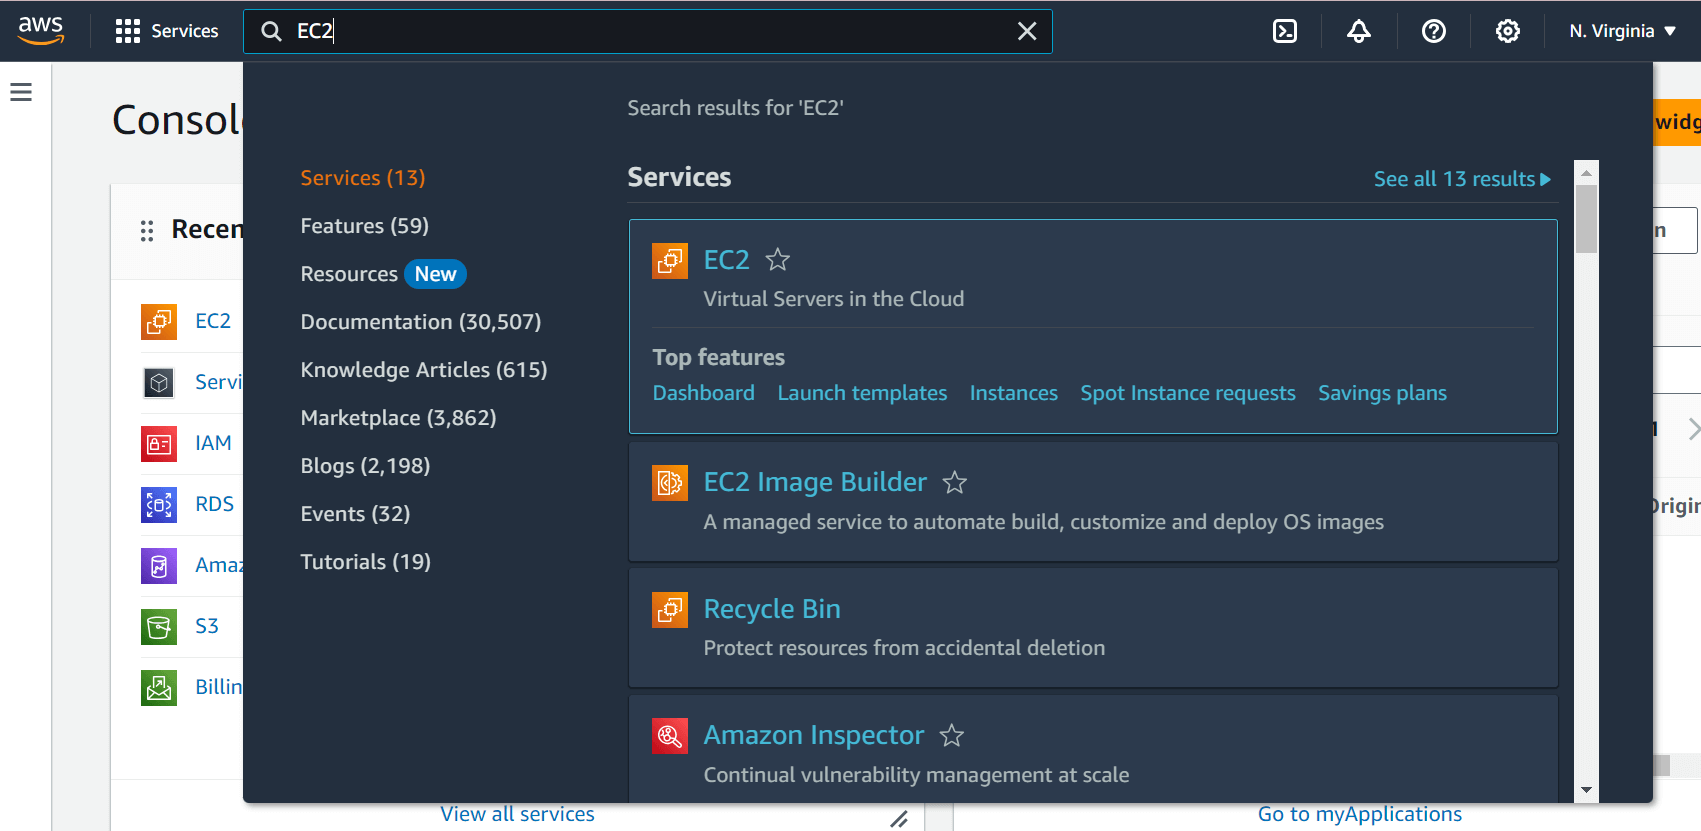
1 - In the console, search for "EC2" and click on it to open the EC2 Dashboard.
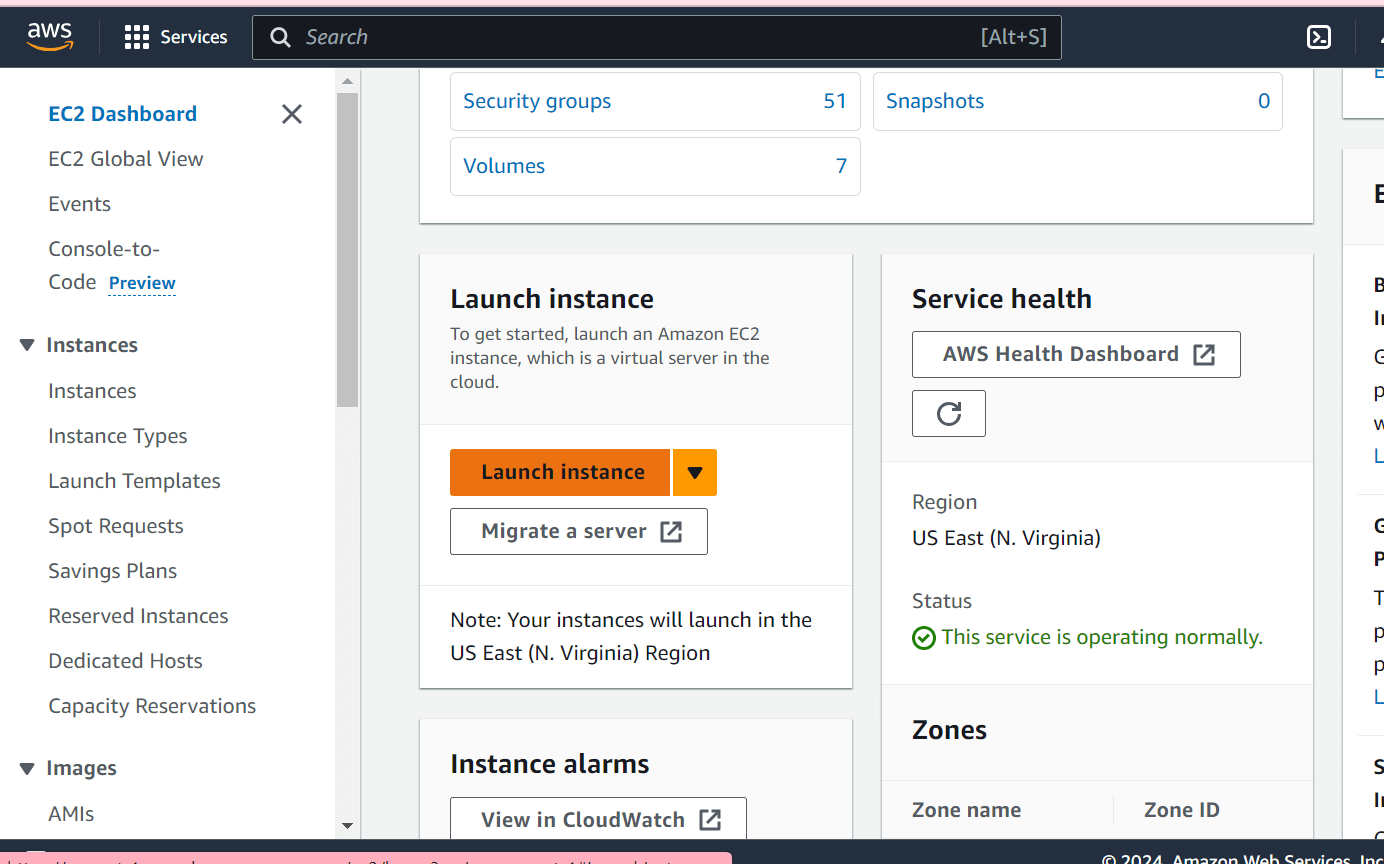
2 - Click on the “Launch Instance” button
3 - Provide a name to your server, for this blog, we’re keeping it instance-example.
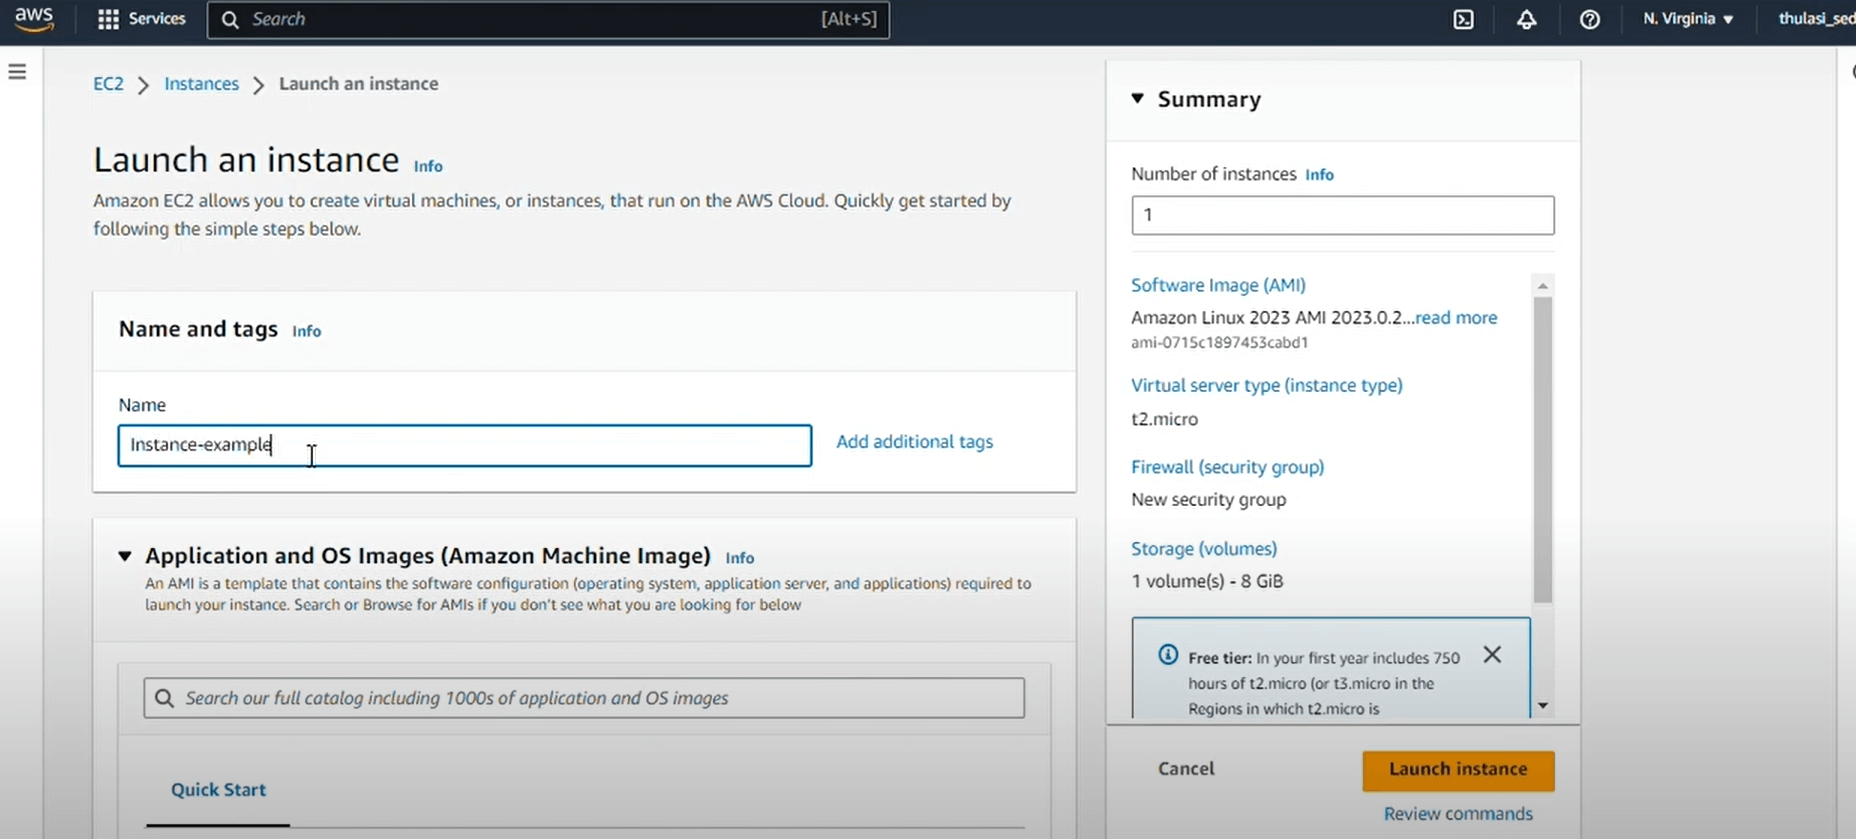
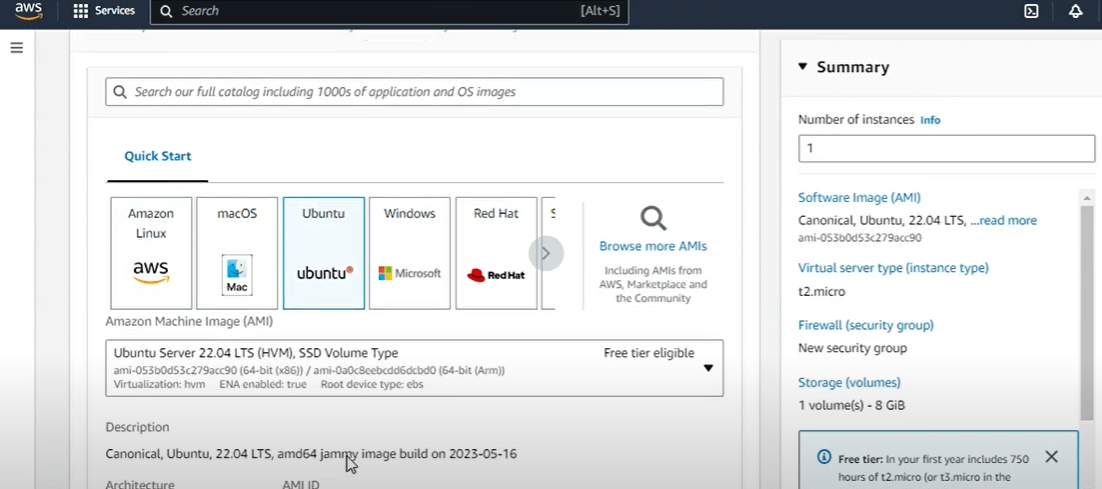
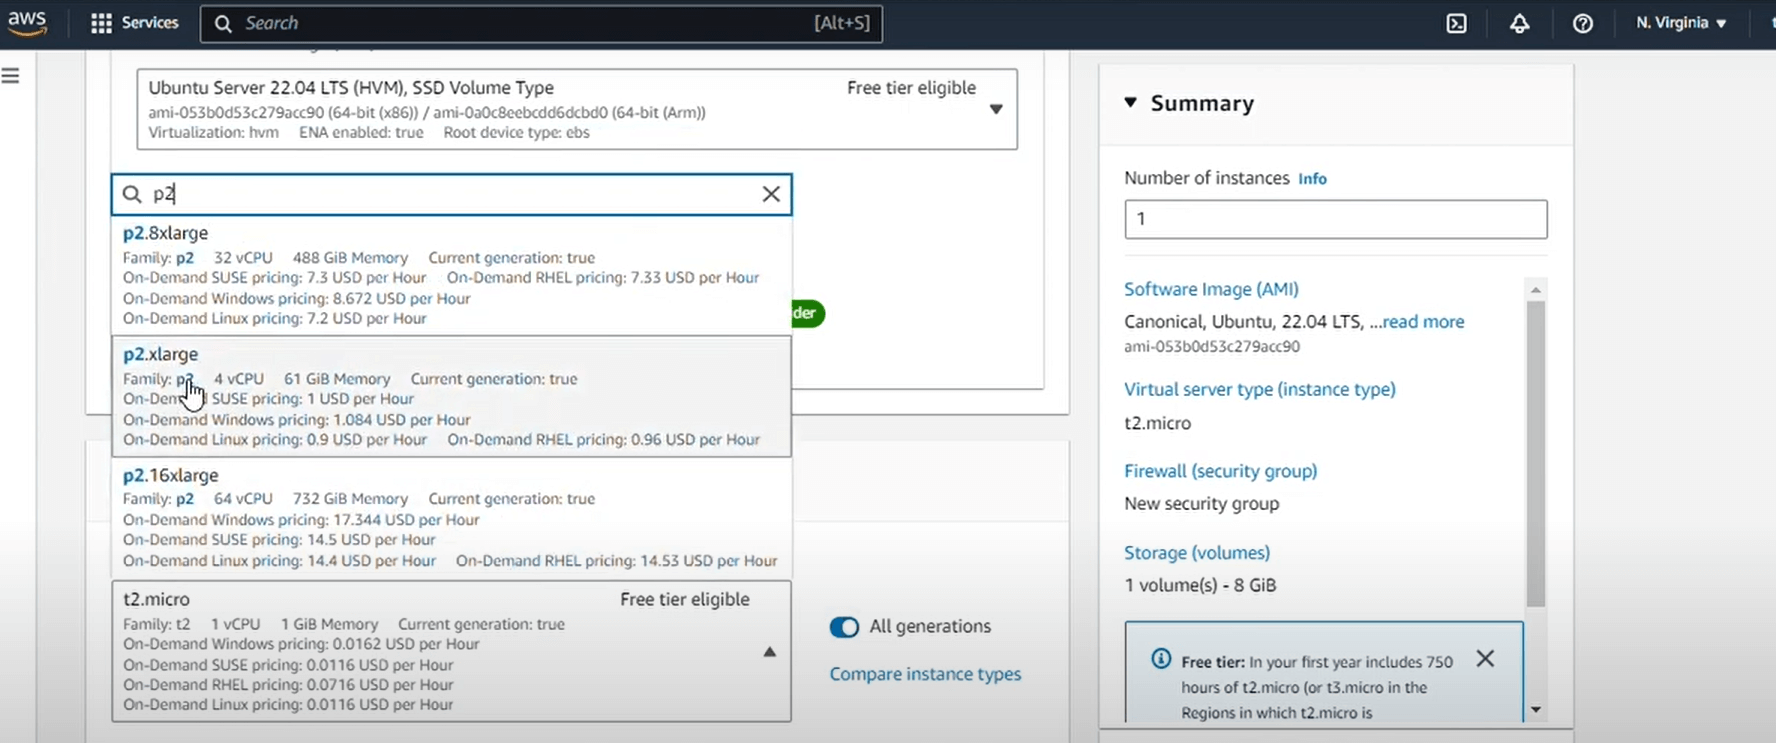
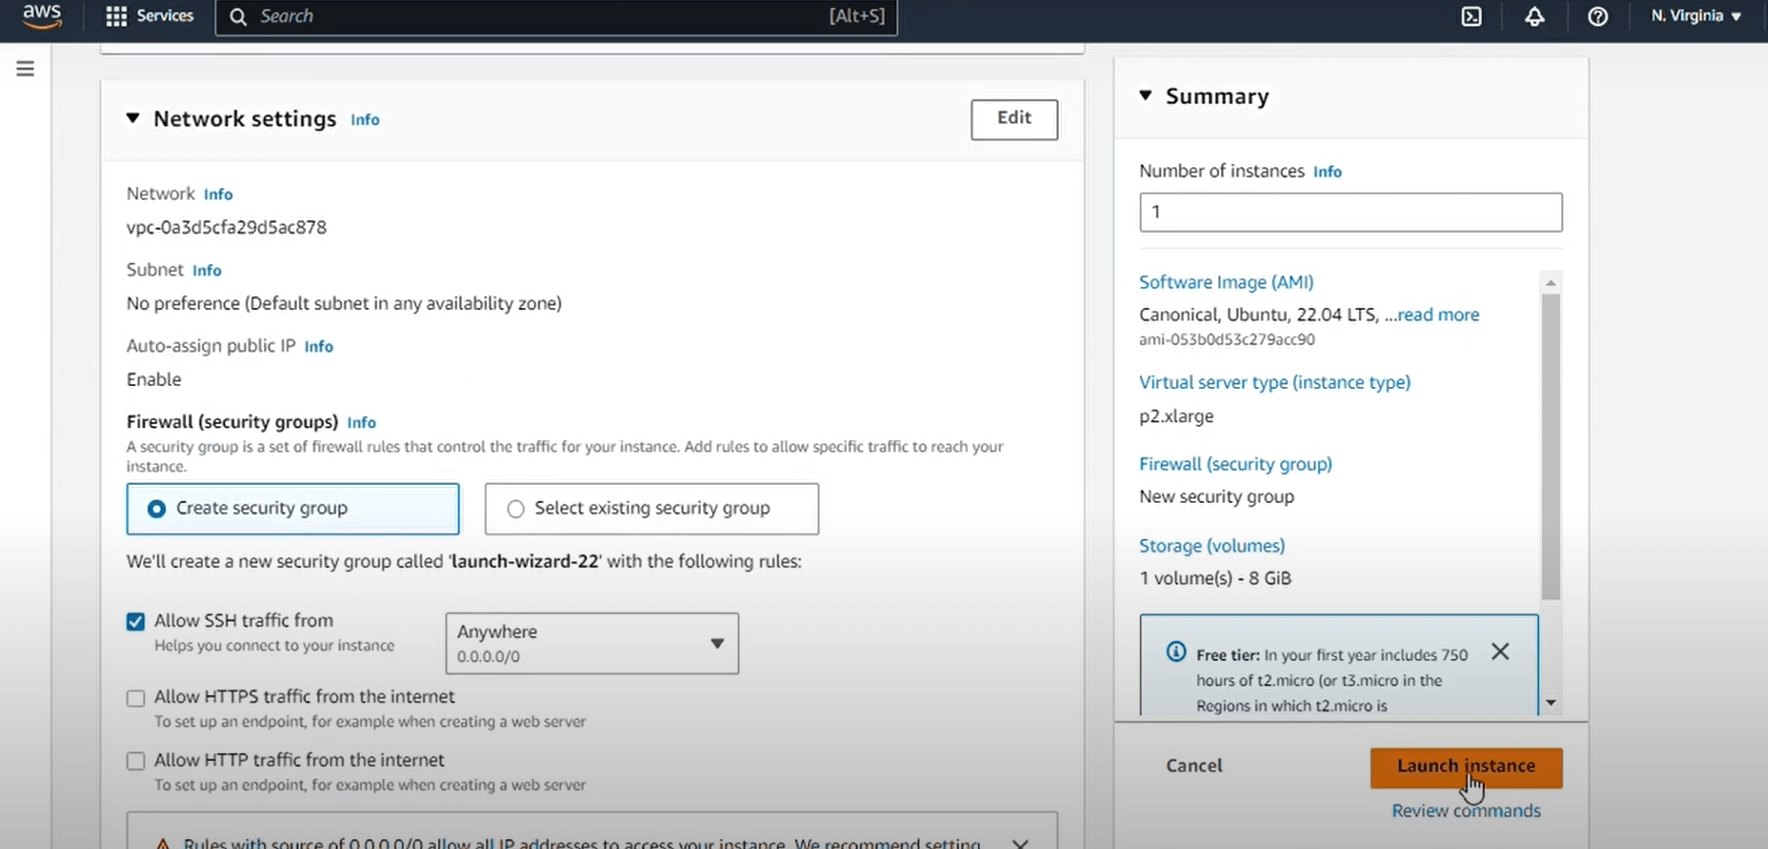
4 - For the operating system, we’ll choose Ubuntu. We’ll choose the instance type as “p2xlarge” for this blog, since it’s the cheapest instance with GPU. If you prefer other instance types with GPU, feel free to go ahead with them.
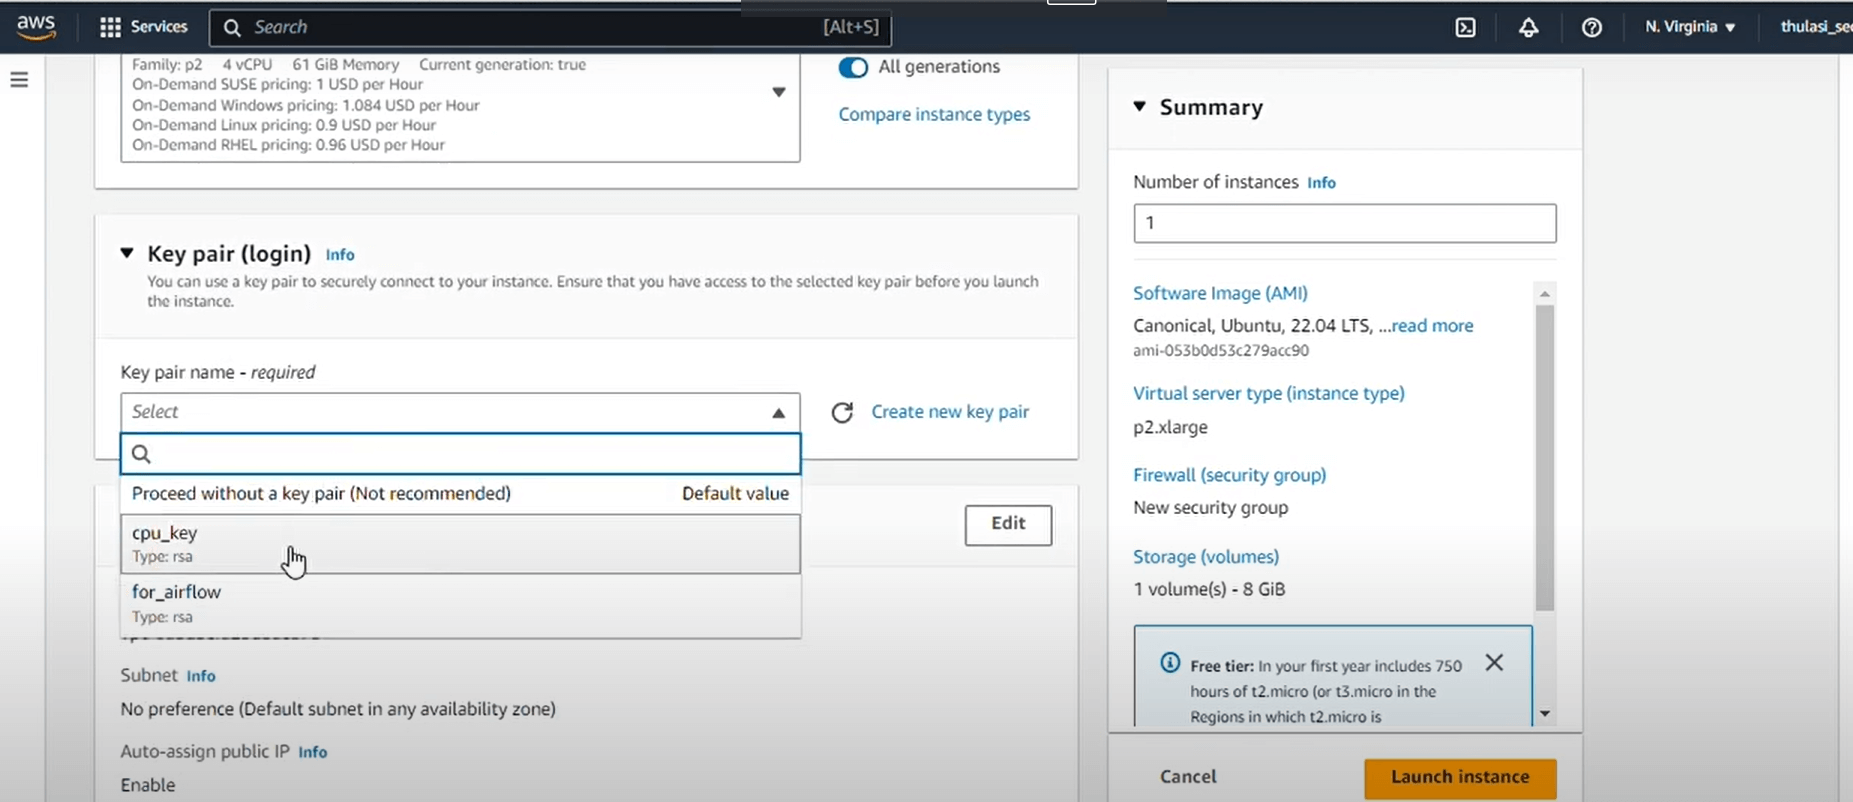
5 - We’ll choose a key pair.Create one if you don’t have it already.
6 - We’ll increase the storage a bit, since GPU heavy programs will be of large sizes usually.
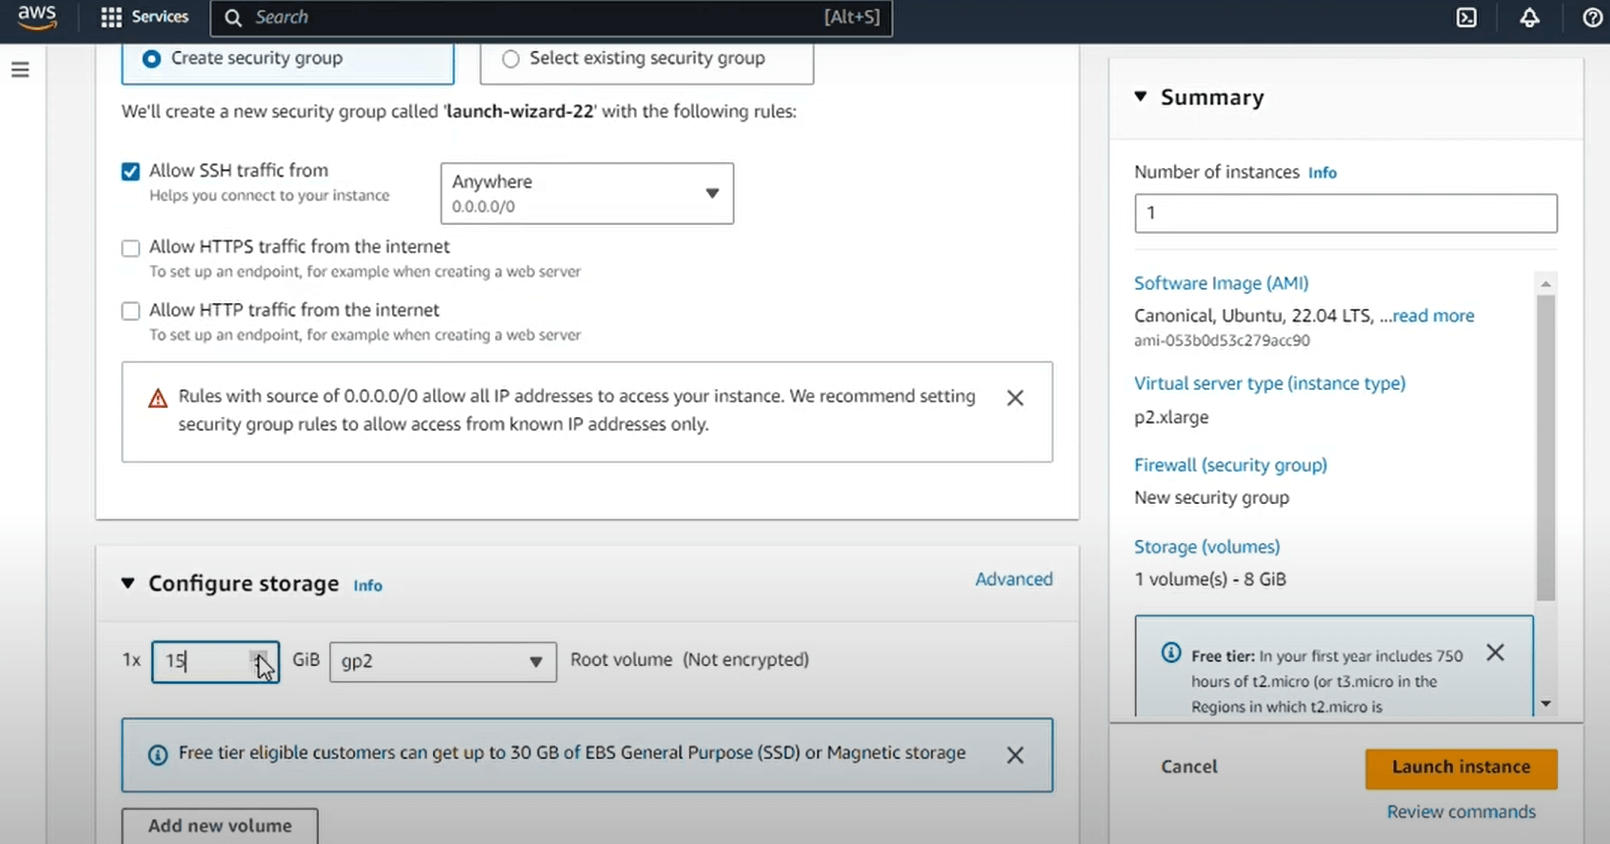
7 - And let’s launch the instance now. We will have to wait for the instance to launch and then let’s connect to it.
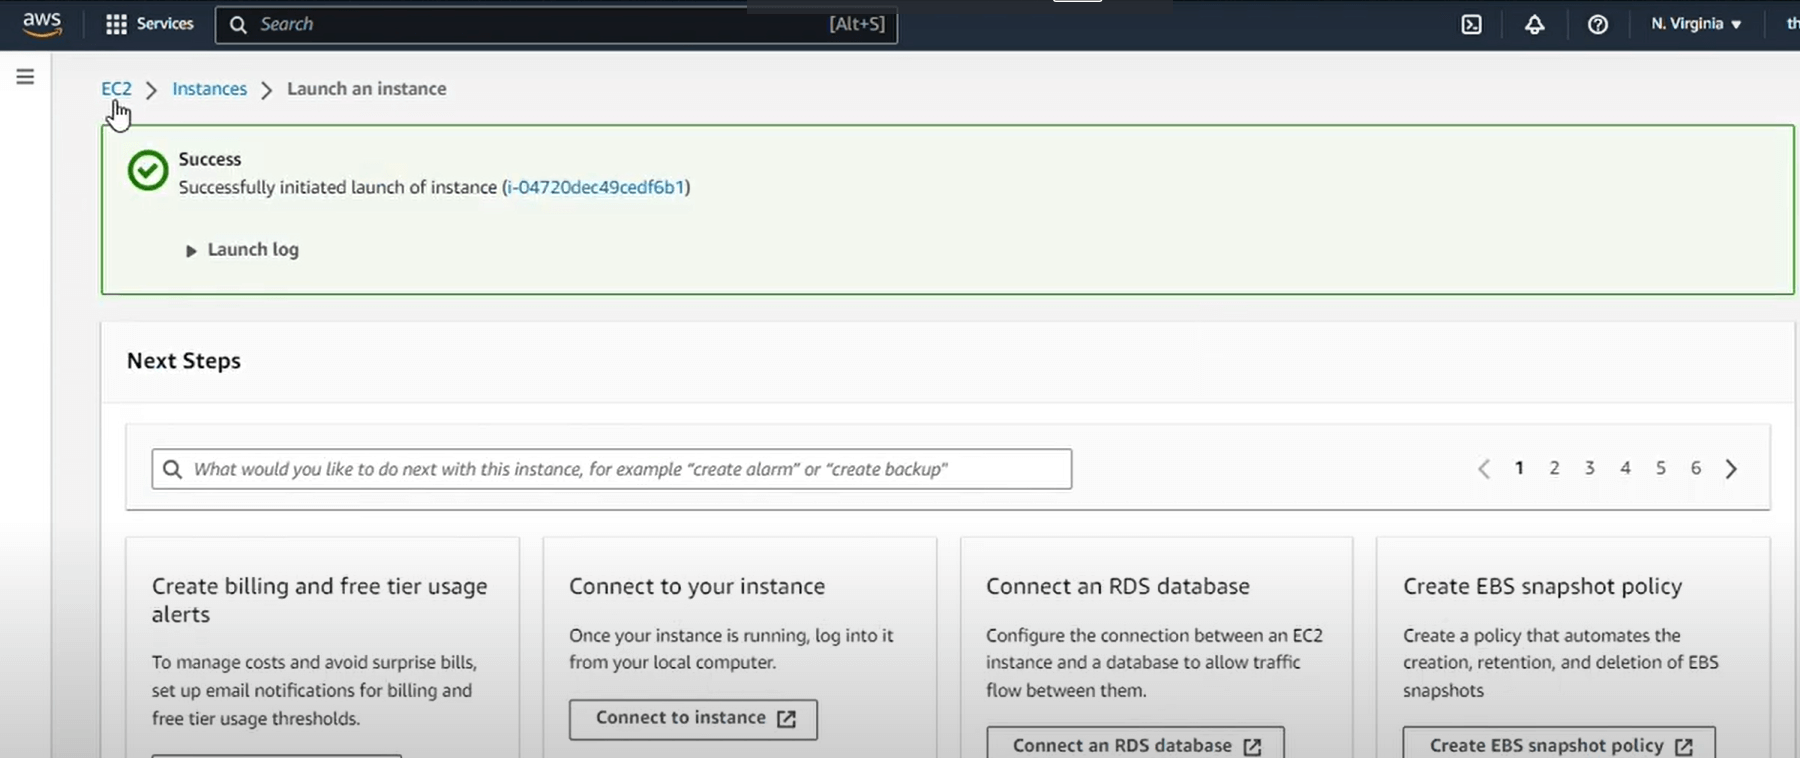

8 - Now, go back to the instances page and connect the instance-example instance as shown.
Step 3 : Install NVIDIA Drivers
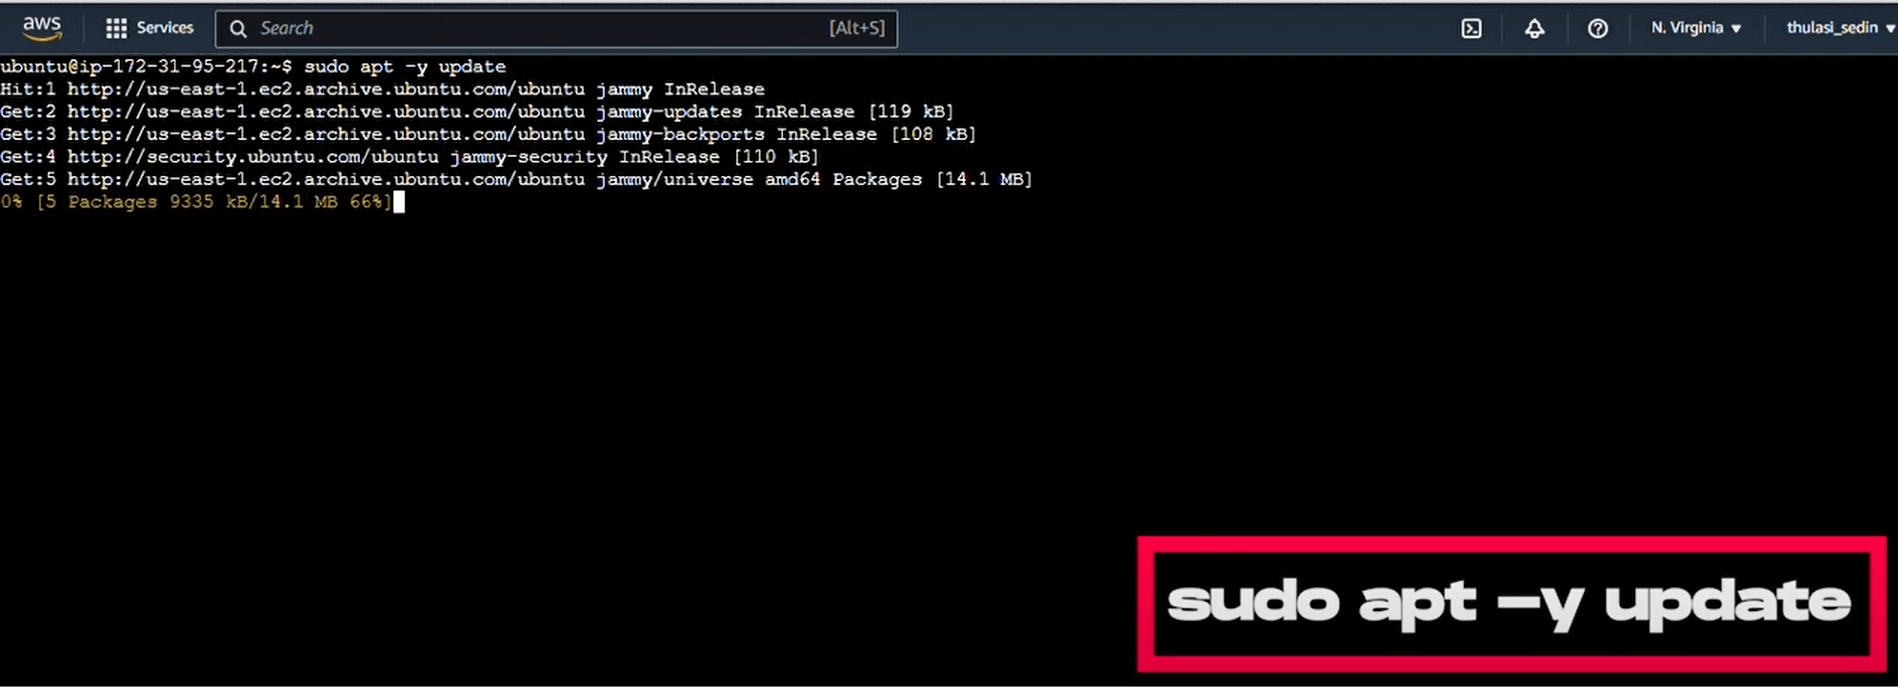
1 - Now, we’ll update the packages currently installed in the system by upgrading to their latest versions by typing sudo apt -y update.
2 - Next we need to find a compatible driver for the GPU. For this, we need to follow this link and open this website :
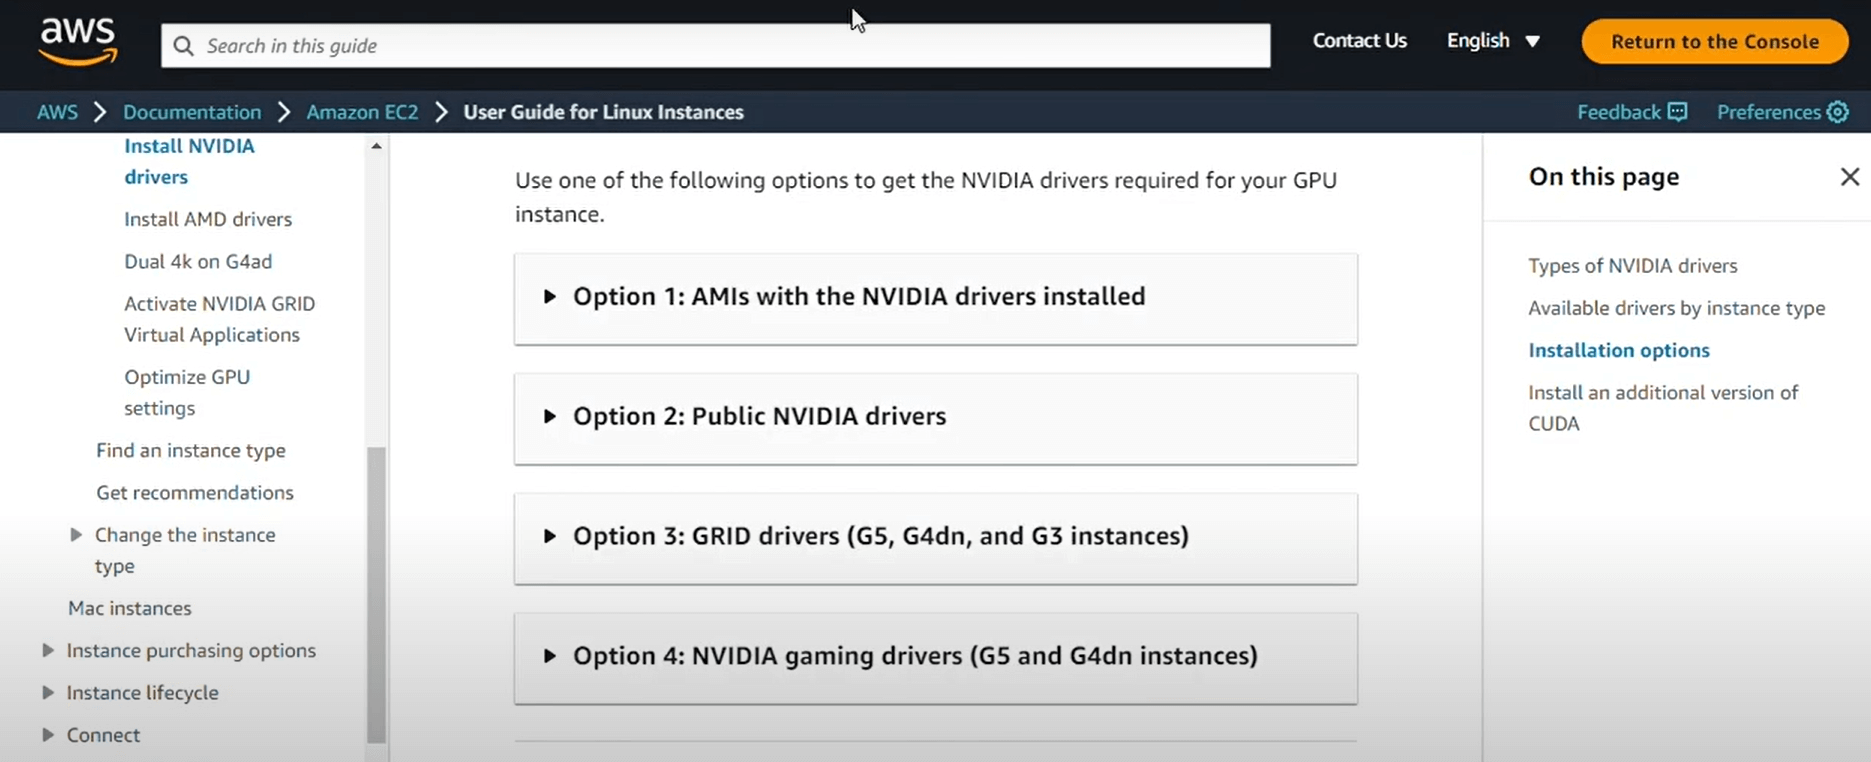
3 - We expanded “Option 2 : Public NVIDIA drivers” to find the specifications we needed.
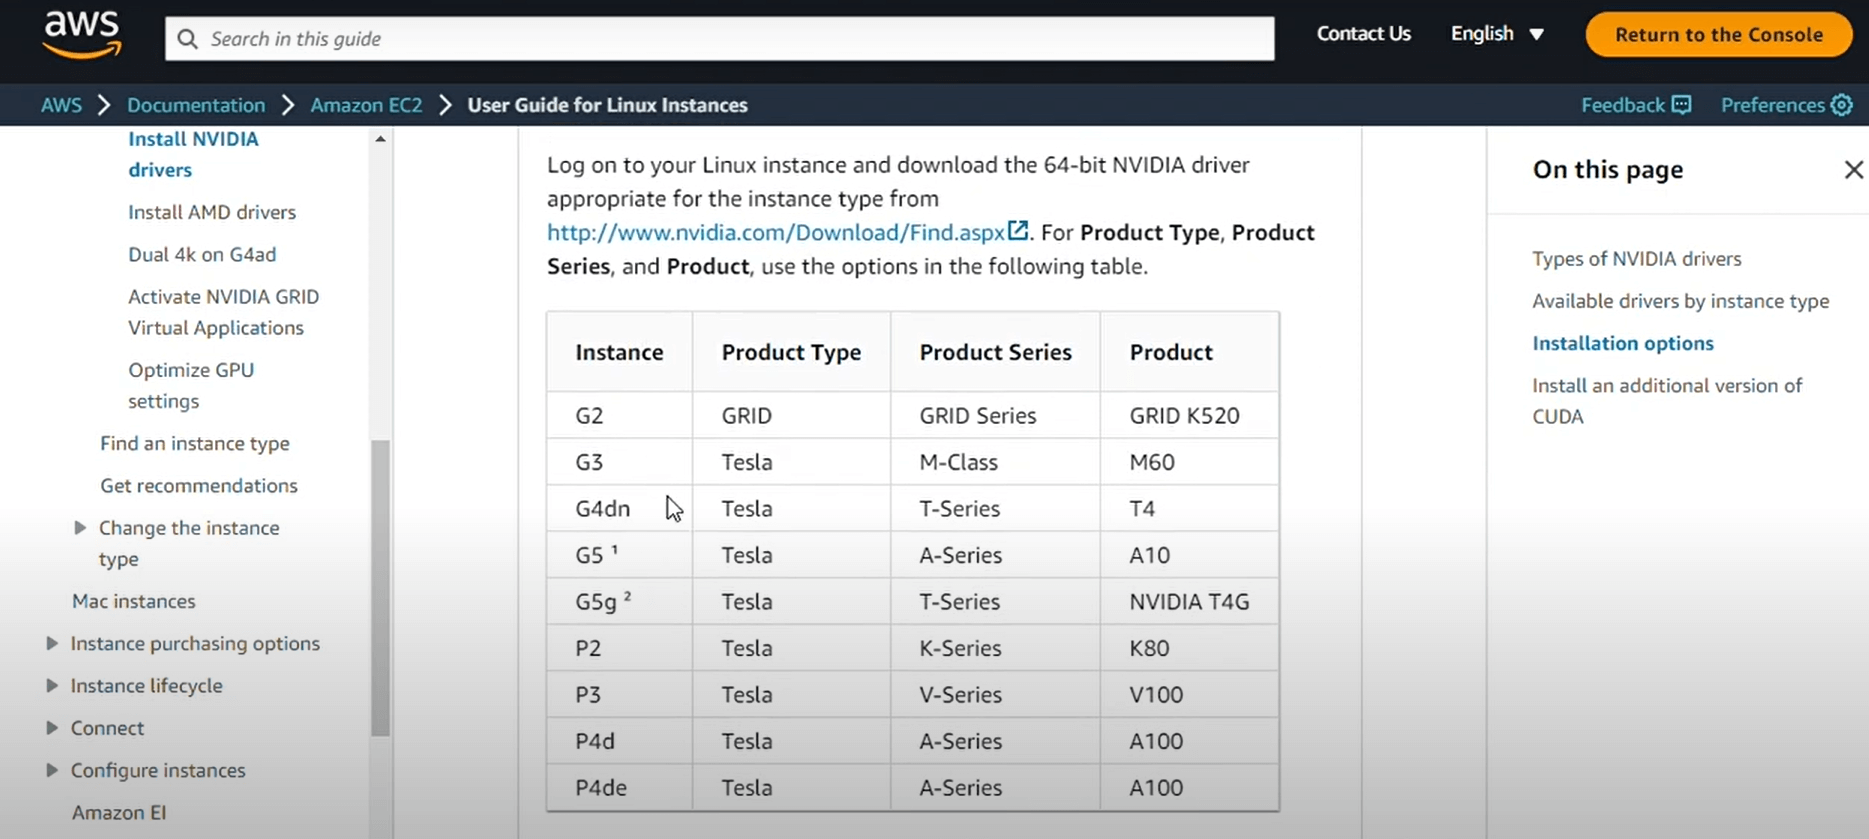
4 - After this, we open this link :
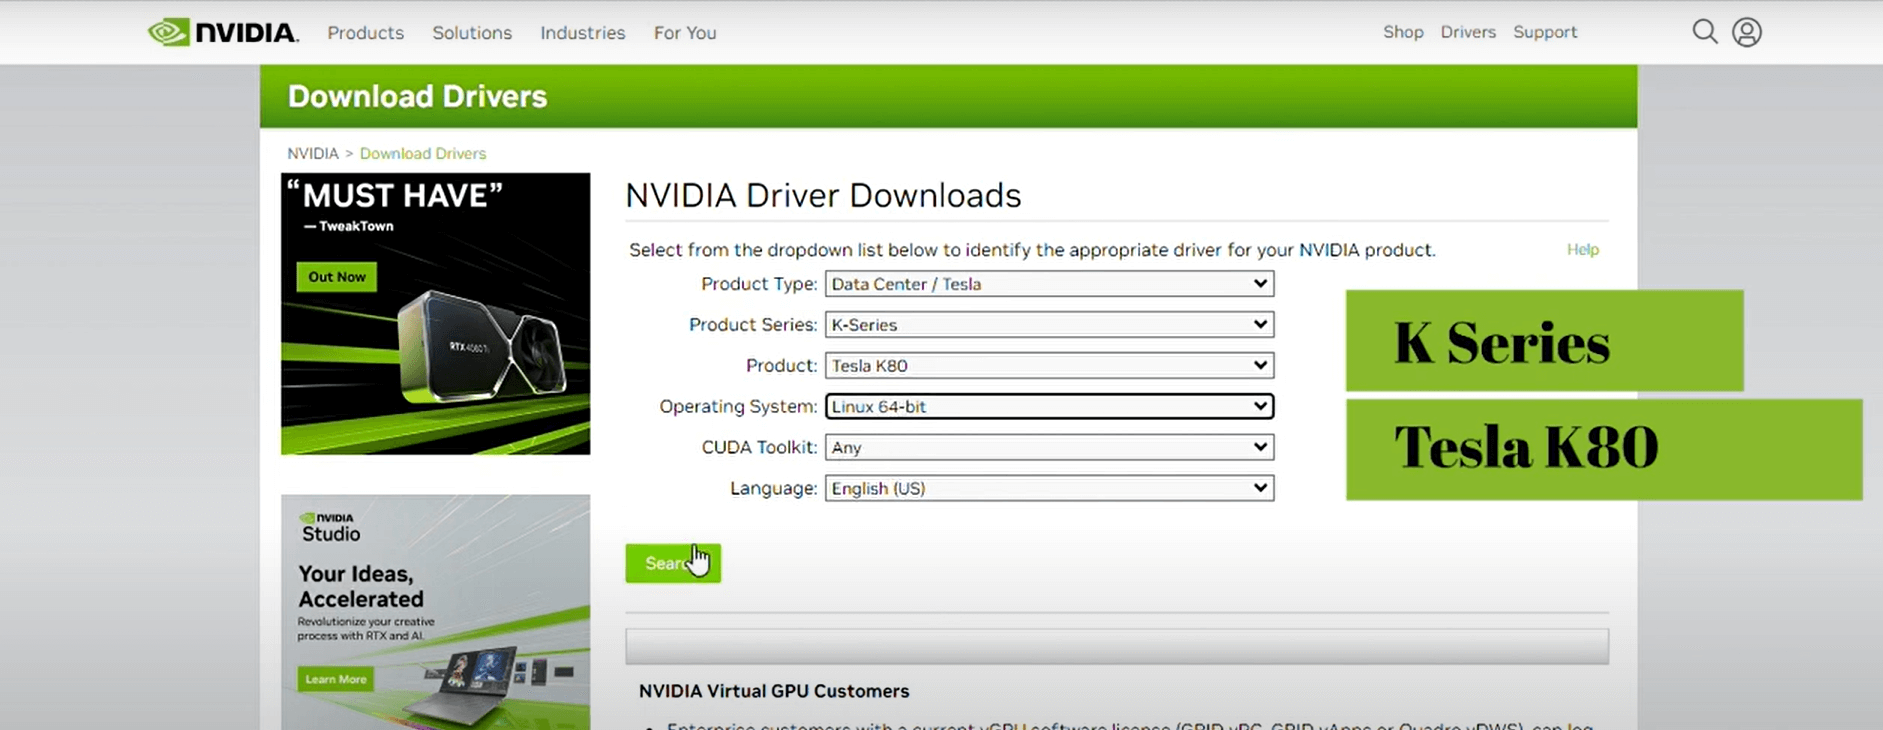
to open the nvidia driver downloads page. Our instance is P2, and our product type is Tesla, product series is K series, and the product is K80. Choose the operating system as Linux 64-bit and search.
5 - Now we get the version of the driver we need. Copy or make a note of this version.
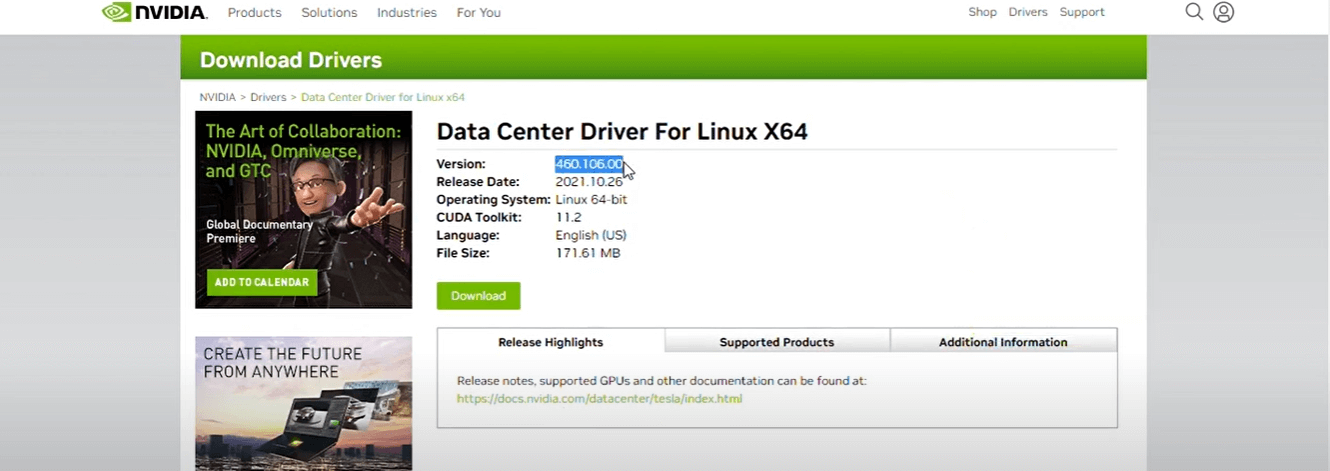
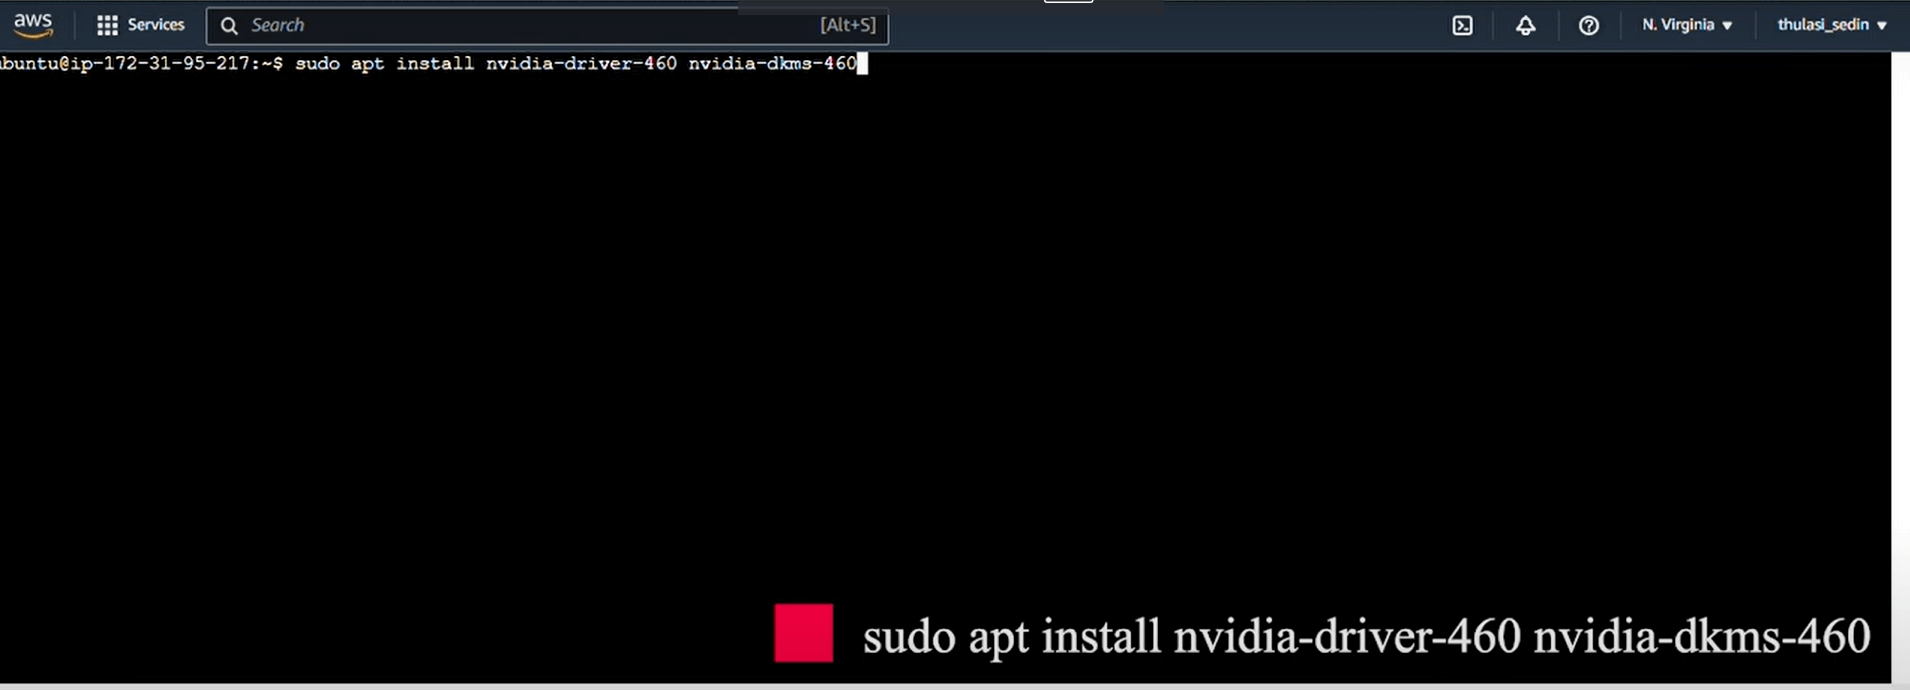
6 - Open the instance terminal, and type : “sudo apt install nvidia-driver-460 nvidia-dkms-460”, 460 being the driver version that we got. We let it finish installing.
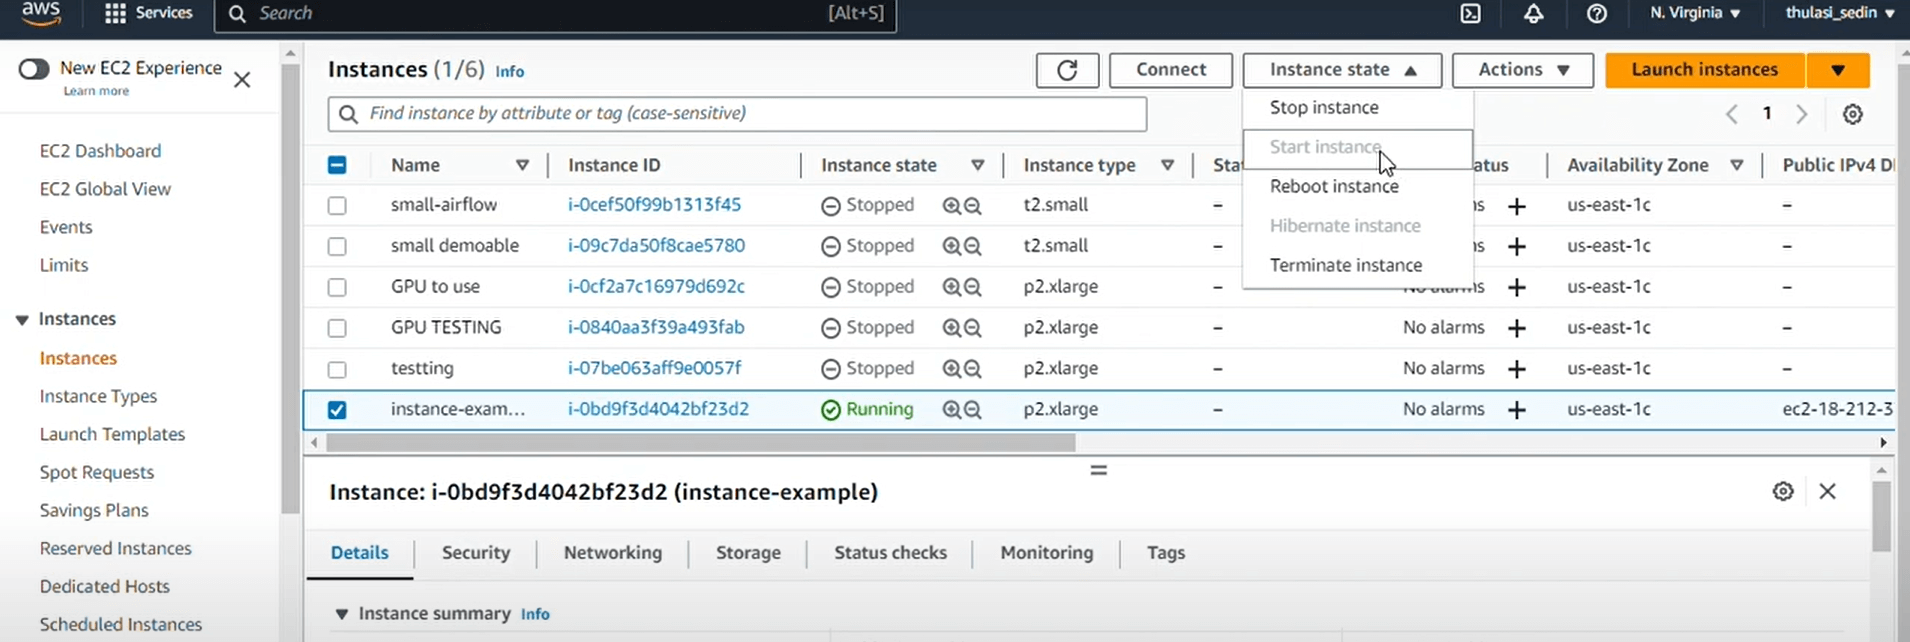
7 - Now, we restart our instance. For that, go back to the instance page, stop the selected instance and connect it again from the “Instance State” menu.
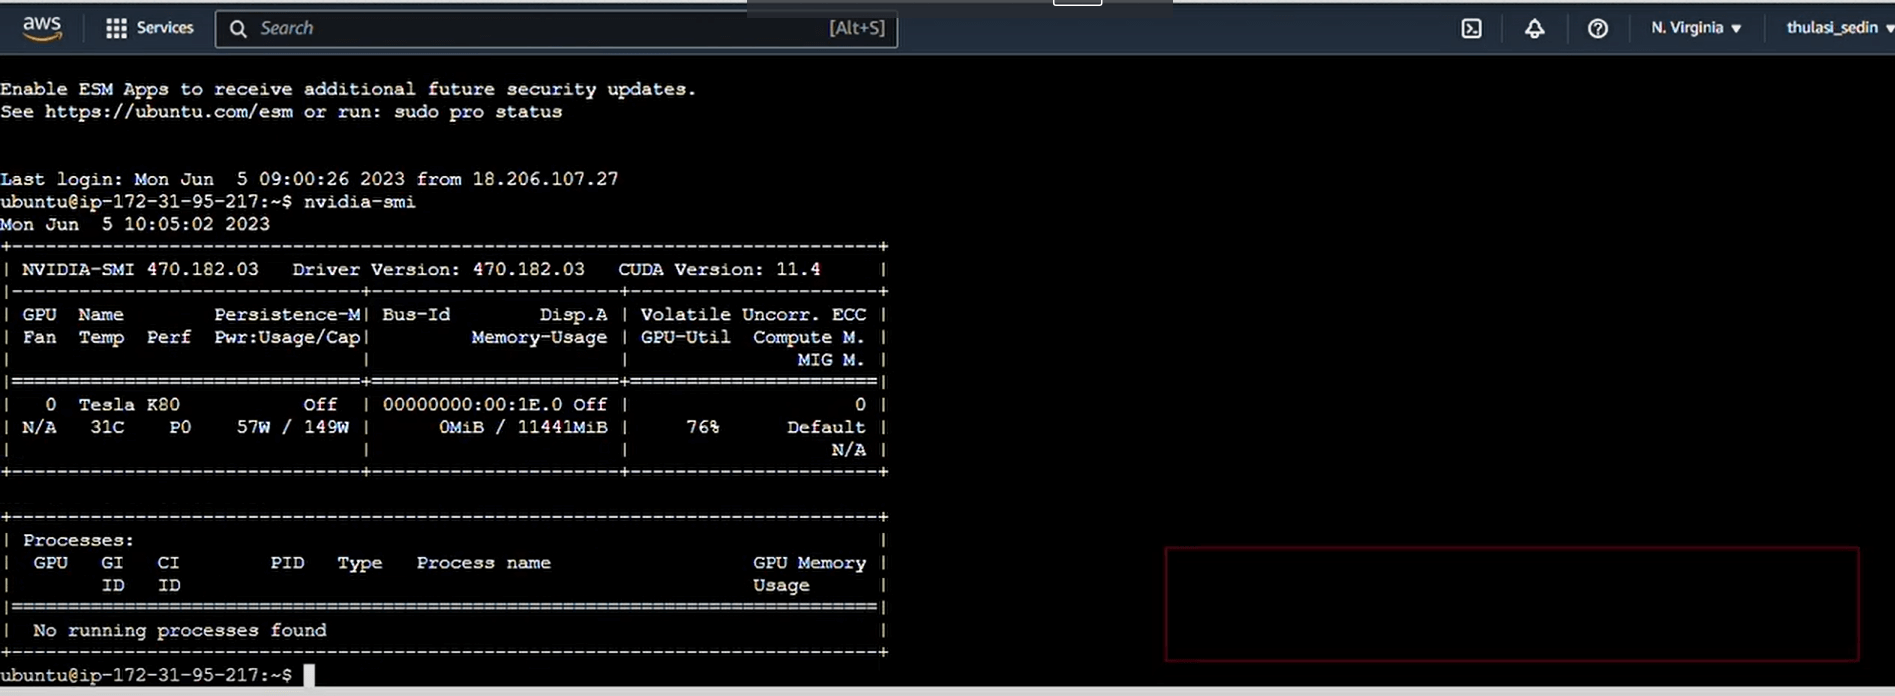
8 - Now, when we execute “nvidia-smi”, we can get details of the Graphic card. If the graphic card displays, that means that we have successfully installed and now we can use any application.
Conclusion
You have successfully launched an Amazon EC2 instance with GPU capabilities, installed the necessary NVIDIA drivers.This setup will allow you to leverage the power of GPU for your computational tasks. We have also documented the instructions for running Airflow on EC2 instance. You can check that out, if you want to set up and manage scalable data pipelines. If you encounter any issues, refer to the official AWS documentation or the NVIDIA documentation for further assistance. Data team is planning to consider Microsoft Fabric? Click on ‘contact us’ to send your requirements and we will set up a free consulting session with our senior solution architects.
Build and accelerate your ML pipelines the right way—explore our data science consulting services.

by Apoorva
Apoorva, ex data scientist at datakulture, worked closely with the data science team—supporting research, data exploration, training, and model-building activities. With a strong blend of analytical, creative, and communication skills, she loved spreading knowledge through engaging audiences in events, writing blogs and technical papers, and participation in platforms like Medium.


